
DIY Glass Image art ~ Giveaway!
Through the summer a big part of our road show is Glass Image Art ~
We are now offering DIY (Do it yourself) kits
with everything you need to create your own glass image art jewelry.
The GIVEAWAY is your choice of
Necklace and earring set and one of our DIY Kits ~ Two winners!
you must follow my blog and leave a message here, your blog, Facebook or Twitter - tell us if you would be interested in more DIY kits in metal & unique beads with tutorials or you can share this giveaway with your friends...be sure to create a new message with each place you share this!
We have 2 kits right now
$22 & free shipping
$22 & free shipping
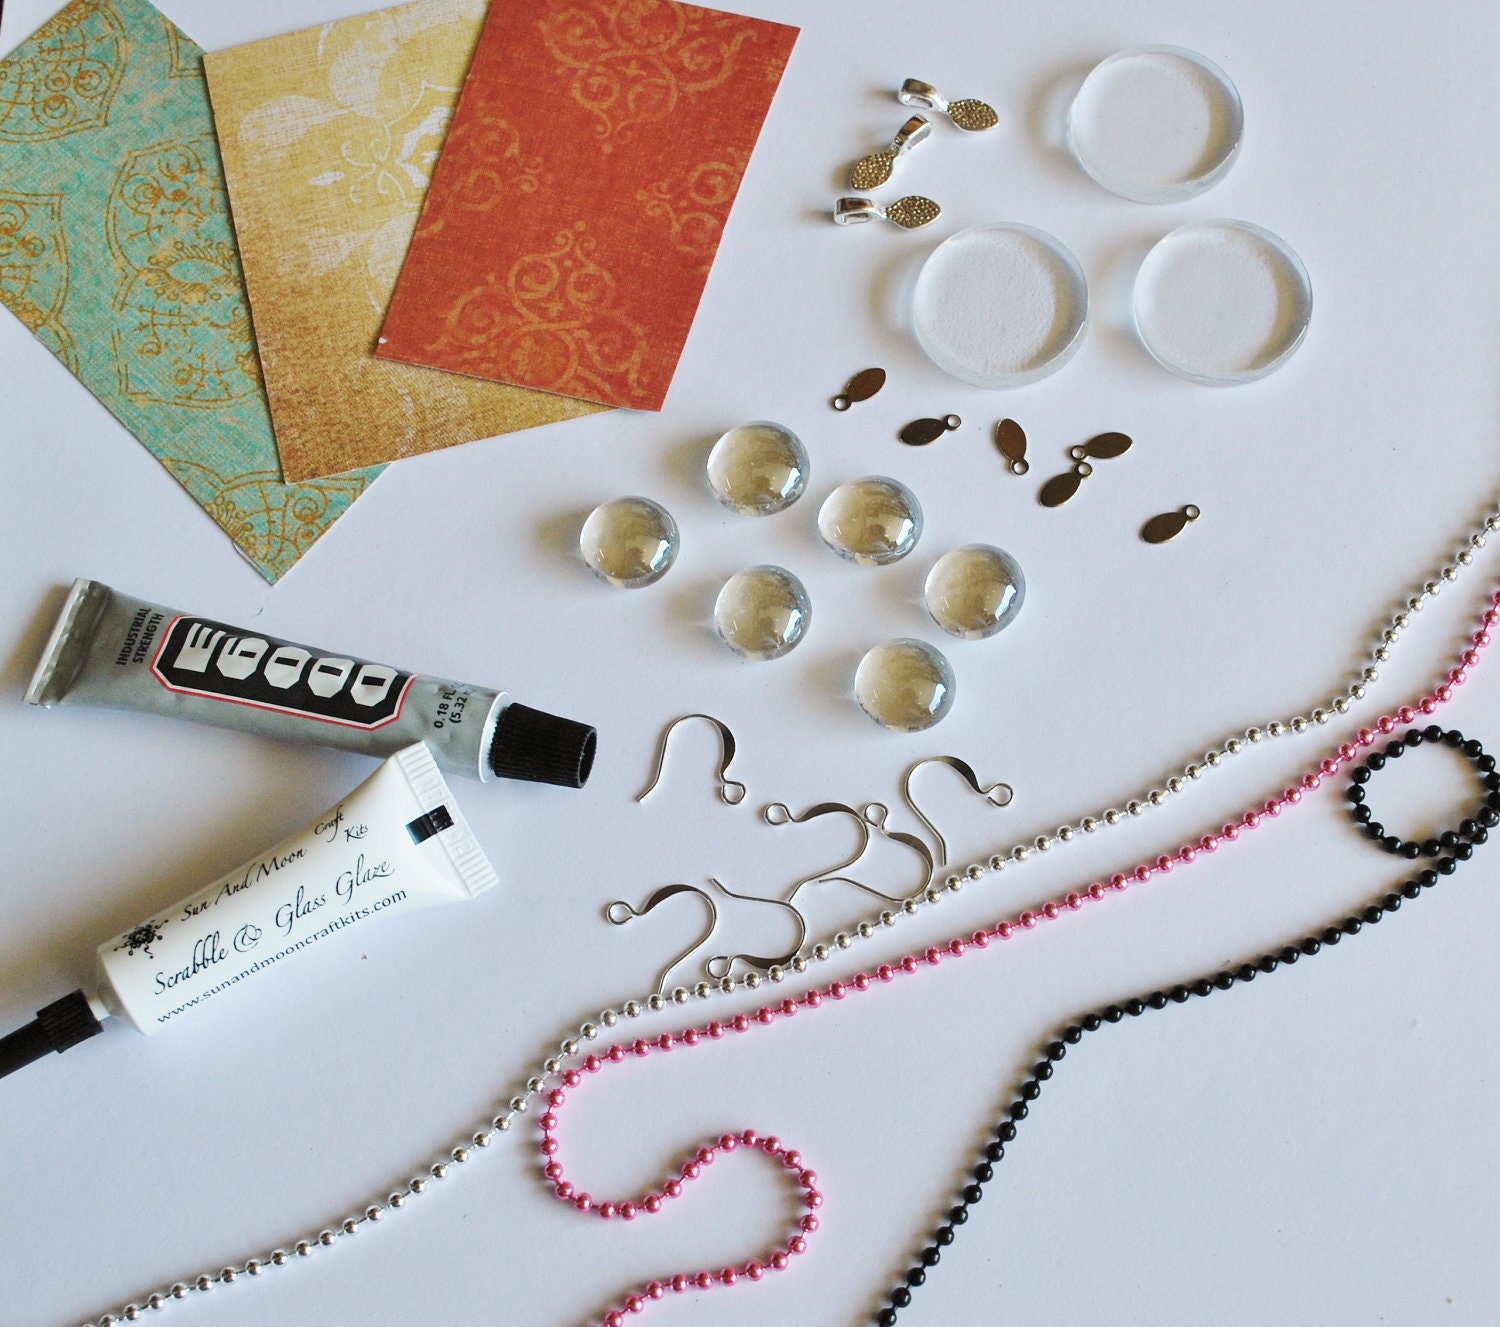
3 round 1" glass tiles 6 small round glass tiles, glaze, glue, chains, bails and tutorial
Here's a quick tutorial to show you how it's done!
Melinda Orr Designs
DIY Kit
Glass Image Art Pendant Tutorial

This tutorial will show you how to make glass tile
pendants or earrings as well.
Materials needed:
- Glass tile ~ with flat back
- Paper (scrapbook paper, magazine cutouts, or photos)
- Dimensional glaze (Diamond Glaze, Sun and Moon Scrabble and Glass Glaze)
- Bail (notice the pendant and earring bails are different)
- E6000 Glue (industrial glue suitable for metal bails)
- Scissors
- Small tip paintbrush

Step 1 – Choose your pattern paper. I have chosen double sided scrapbooking paper, but you can use your scraps of paper, old magazine pages, or even print a photo for a personalized pendant (great for mothers day, fathers day, birthdays etc). If you are using a picture that has an undesired back, you will need another sheet of paper.


 |
Circle punch out tool (1” round circle) |
Step 3 – If you are using a picture with an undesired backing you need to use the glaze to adhere the finished backing to the picture. (If not, skip this step).
|
| Lightly glaze picture back and press |
Step 4 – Apply a generous layer of glaze to the back of the glass tile (the flattest part of your tile). Make sure to coat the entire surface and slightly over the rounded edges.
 |
| Diamond Glaze on Glass Tile |
Step 5 – Place your punched out piece of paper over the glass tile (remember to place the paper face down on to the glass), move the paper into place with your fingers and turn the tile over. If you do not use the punch out method, just place the glass tile on the desired paper. Push down firmly on the tile to rid of any air bubbles that may have occurred.
 |
| Punched out circle |
|
| Glass tile glazed to double sided paper |
 |
| Glass tile on picture glazed to backing |
Step 6 – Then, by using a small paint brush, go around the edges to smooth out the extra glaze. This will help seal the paper to the tile and make it easier to cut out the glass tile once dry.
 |
| Add caption |
Step 7 – Leave to dry (this may take a few hours for the glaze to adhere to the glass and paper). Your tile may slide over the paper slightly, if so, move it back into place.
Step 8 – Once dry, cut out along the edge of the tile with scissors, making sure the edge is smooth and even. Then, apply E6000 glue (suitable for metal) to the back of the bail and apply to the pendant . Leave to dry (about 24 hours)
 |
| Earring Bail on glass |

Pendant Bail
 |
| Double Pendant Bail |
You can create all sorts of pendants - here are some examples:


using a StazOn stamping ink.
You can see from the pendants below that I have.


Have fun, be creative, and enjoy!
Angela Orr ~ Glass Image Designer
Check out the rest of our Glass Image Art items
on our ETSY Site
This tutorial is for personal use only and may not be sold ~
Please feel free to share this giveaway and tutorial with direct links back to my blog ~ Please!
Check out the rest of our Glass Image Art items
on our ETSY Site
This tutorial is for personal use only and may not be sold ~
Please feel free to share this giveaway and tutorial with direct links back to my blog ~ Please!

32 comments:
I love these! Thanks so much for sharing the tutorial!!!
I'd love to win one of the DIY kits as I've never made these before.
I'm already a follower of your blog.
I love the option to buy DIY kits and would enjoy having metals and beads available too. The tutorial is very helpful and understandable. I have shared the giveaway on FB. Thanks!
I posted this on the sidebar of the blog.
These are so cool! I love DIY kits, they're a great way to throw your own spin on what you make.
Thanks for the great tutorial! I have some of the glass tiles which I bought them over a year ago - you make this so simple!
yay~ what a nice tutorial. thanks for sharing. i really hope i win so that i could try making one too. i already have an idea of what ill make :D
punkme15 at gmail dot com
im already a GFC follower of your blog, name is Jel
punkme15 at gmail dot com
i am also a fan of crafts and arts, so i would definitely love to read more DIY tutorials <3
punkme15 at gmail dot com
shared on twitter: https://twitter.com/mynameisjel/status/77978730940727296
punkme15 at gmail dot com
shared on FB also: http://www.facebook.com/permalink.php?story_fbid=214525951903518&id=100002184952335
punkme15 at gmail dot com
Oh OH OH I so want to try this!!!!! I love the idea of DIY Kits especially with instructions like those! What an awesome giveaway! I will share this on FB right now! Although I want it for myself! LOL
Thanks for the great step-by-step tutorial. I just received a few glass baubles this week & was hoping to give them a try soon in bezels. Yes, I think DIY kits are a great idea!
I mostly do bead embroidery but would love to try this. A kit would be great!
I am your new follower!
I shared on Twitter.
Shared on FB
I blogged here http://gemtrails.blogspot.com/2011/06/tutorial-glass-image-art-giveaway-from.html
I did blog about it!
http://kristen-beadjourney.blogspot.com/2011/06/you-have-to-check-these-giveaways-out.html
Thanks so much. A very well written tutorial. The DIY kits seem perfect.
Thanks for also hosting a give away.
lukathewriter(at)gmail(dot)com
Thanks so much. A very well written tutorial. The DIY kits seem perfect.
Thanks for also hosting a give away.
lukathewriter(at)gmail(dot)com
Ooooh, I love diy stuff! :)
badorka@vipmail.hu
Wow! I came over from another blog site. I am amazed at how easy you made that tutorial look. I think I have a new summer project! Thanks so much for the giveaway!
I have seen these before, but my Crafter sense says I WANT TO TRY THIS!!! Add me to the giveaway, Thanks
I love DIY kits. They lead to so many more ideas!! Thanks for the tutorial, I have some old sheet music that would be perfect for this.
I love DIY kits. They lead to so many more ideas! Thank you so much for the tutorial.
Very cool tutorial!! I love the kits, this is something I really want to try out. I am a follower on google connect.
I liked you on facebook
Hello, nice giveaway, its nice to try these as we can't find them here in my country.
Am a follower.
Nathalie
very cool tutorial! I would love to win one of your DIY kits!
OMG I so need this kit! I would be thrilled with either one :-)
Shannon C
Thanks for sharing! I would love one!
I follow your blog:>)
Post a Comment