
I've been promising this tutorial for a few weeks now ~ I got blindsided with an amazing response from my sale last week, but I finally have it ready and would love to answer any questions, so please don't hesitate to ask! Before I had these rivets, the process really intimidated me ~ My new nail head rivets really make it so easy to set them securely and will look professional! You may even already have the tools you need...
Getting Started with Riveting ~
Here's what you'll need ~
Rivets
1.5mm Hole punch
Riveting hammer or Chasing hammer
Flush wire cutters
Assorted shapes of jewelry parts
Hard Surface/block
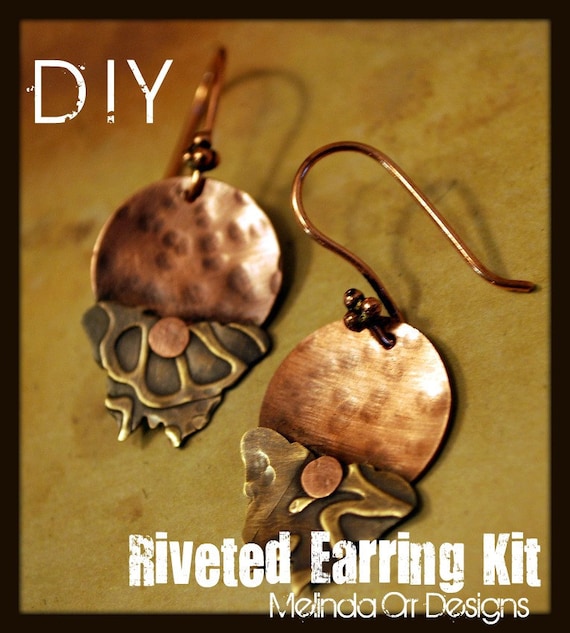
Today we will be making earrings from my
Riveting Earring Kit ~ $35
 |
| Available on my Etsy Site |
1 - 1.5mm metal hole punch from Bead Smith
(retal cost $15.99)
6 - copper and brass blanks $10
6 - copper ear wires $3
6 - small accents to rivet onto earrings $7
20 asst rivets $2.50
1 copper/brass cleaning pad.50
(a savings of $4)
*plus a free email copy of my tutorial with lots of tips not mentioned here!
A nice little mix of my choosing to try out riveting.....this will give you enough to make 3 pair...
At $11 cost per pair, this is a great deal ~ look for upcoming tutorials on my blog for how to :-)
Will be predominantly copper w/ brass and perhaps nickle silver or aluminum ~ If you have a preference as to the metal choices
Easy for you to purchase here ~
It includes the 1.5mm hole punch ~ so it's a great way to get started ~
Let's make Earrings ~
Here are my 6 components to decide how to put together ~ I've chosen to start with these ~
 |
| All items included in your DIY Riveted Earring Kit |
Now that I've decided how I want to put them together....
I texture or shape my pieces
 Hammered oval washers ~

Once you have the look you like ~
put the two pieces back together & hold it where you want it to connect
The butterflies come with a pre drilled hole so you can really just make a centered hole on the component where you want to connect it.
The butterflies come with a pre drilled hole so you can really just make a centered hole on the component where you want to connect it.
If you're trying to connect bracelet links and need to be precise, pick up your hole punch pliers and put the punch exactly where you want the hole (you will be holding both pieces together) Then squeeze slightly (don't punch a hole just yet)...just squeeze enough to put an indent in the top and bottom piece~ This will be your mark to a correctly placed rivet.


Remove the pliers (without creating the hole) and then put the hole in each piece separately ~ They will be perfectly aligned and it will save on wear and tear of you hole punch pliers ~
Go ahead and repeat for the other piece of the set ~
If you have any burrs from the hole punch, you can file them off now using files, Dremel or flex shaft ~


Find a hard surface to work on...Now you can put your rivet in through both pieces to be cold connected ~
you can rivet it with the nail head on top or on the bottom ~ I do it both ways...just depends how curvy my pieces are...sometimes it's easier the reverse way~

Cut your rivet with flush cutters to 1/16" or 1.5mm above the joined pieces...
(For this to work ~the rivet must be flat on top..not pointed)
The rivet should fit snug ~ if you use a larger hole punch, your rivet will bend and not set properly & I promise you will be frustrated.if you use a smaller hole punch, you will be filing the hole and wasting precious time ~


Seriously, spend the $16 on my hole punch....you will be happy you did! I promise you will use these all the time for other jewelry designing projects! (You can also use them as a hole punch in your earring cards!)
Now that you have your rivet trimmed flush and snug, grab your hammer...usually I use the riveting hammer ~ flat end...but I have great success with my chasing hammer - round end too.. With very light taps, rotate your pieces in a circular motion as you tap ~ this gives even pressure on all sides of the rivet..which will result in a nice round even rivet head. As you get better at it, you can just hit around the rivet...but this worked for me when I was getting started...


If you don't have these, you can try a regular hammer...but they are so heavy you need to tap very lightly ~
If your rivet bends before it is nicely set ~ there are a few reasons ~
- Rivet was left too long,--look at your ruler and figure out how long 1/16" or 1.5mm is
- Hammered to hard...next time take baby taps...you will need around 12 light taps to set it
- Used a larger hole punch...buy my hole punch! :-)
Now that you're rivet is set, feel both sides...are they smooth and not jaggy...
if they aren't smooth...just lightly tap that out ~


WOO HOO! You did it~ You've riveted.... Now go back and rivet the other pieces ~
At this time you can shine them up or oxidize them...Just dip them in your favorite oxidizing solution
(sorry details for this are for another tutorial)
~ til as dark as you like and rinse well in water ~
Take a piece of 00 steel wool and create shiny highlights on the surface by rubbing in a circular motion ~ front and back


You can add renaissance wax to help slow the oxidizng, but my copper/brass cleaning pads really work great and bring back a shine very quickly...very much like silver!
Once done, add holes on the top of your pieces to connect your ear wires ~ (using your very useful 1.5mm hole punch pliers!)
I love my new solid copper ear wires ...they come oxidized but shiny too ~ so no prep...the one thing I notice is that the loop right below the 3 bead cluster is sometimes too small ~ If you grab the cluster to bend, you could easily snap it off ~ using your round nose pliers, bend the wire just below the cluster to open that space up a bit...then slide the wider part of the round nose pliers in that space and curve it a bit wider~

Now add the charm to your earring ~ place the front of the piece through the ear wire and slide around to dangle freely ~ close the hole with out pressing on the cluster. You can add color by just adding beads, or other fun charms....Here I added Denim Lapis bead charms ~ I love this combo! I could easily have placed another hole at the bottom of the butterfly and dropped the bead from here ~
 | |
| Very likely to sell or make someone very happy to receive! Think I'll go put these in ;-) Btw..holes in earring cards were made with my hole punch pliers..lol! |
Go ahead and repeat this process for the other pieces of the set ~ you can use them as is...bend them, cut them texture them...add chain (using your very handy 1.5mm hole punch~ lol) add wire wrapped beads...make it your own style! You will have great success with this ~ It will open a whole new world of connection possibilities ~
The rivet options are
1/4" or 1/2" Rivets in Copper/Brass or Sterling Silver

All of these items and tools are available
on my Etsy site!
My Components Here
Metal Blanks Here
Assorted Metalworking tools Here
DIY Kits Here
on my Etsy site!
My Components Here
Metal Blanks Here
Assorted Metalworking tools Here
DIY Kits Here
If you order any of my riveting tutorials,
I will email you this riveting tutorial free with extra tips that work for me!
Have fun and be creative ~
Try this design or create your own combination!
Now get riveting :-) It's easy!
Look for more riveting tutorials soon!

9 comments:
It is amazing! I liked reading this post! And the earring is so cool. Great job!
Thanks for sharing. Can you tell me what brand of hold punch pliers you are using. I have not yet found one I like.
Well done tutorial! Very clear and helpful pictures also. Love the butterflies with the lapis. I would be grabbing a hole punch tool because you were so convincing, but I already have one! All that you say about it is true! Looking forward to more tutorials.
Thank you so much for this tutorial. I am new to riveting so your tips are very helpful. I will be heading to the shop for some rivets!
Hi Melinda, i am so excited about this tutorial...i have all the supplies but still have not tried it...your tutorial has given me some mojo...i hope you keep them coming i am sure they will be a huge hit!!.thanks so much i am off to the shop t have a looksie..i have the hole punch but i think mine in a 1.8 hole.
ttfn Lana :)
These are amazing and you make them look so easy! I think I'm going to have to try this after the Holiday shop hop - when I will finally have the time! :)
Thanks again for sharing this!
Oooo! I've been wanting to learn this - I can't wait to try this!
I found your link on The Beading Gems Journal, and had to stop by. I love your style, it is awesome. I've just started do a little bit of riveting. I love the look of cold connection. Bookmarking. Great tutorial, Thanks for sharing.
Mixed Kreations
Oh thank goodness you wrote this tutorial! I kept mashing the poor lil' rivet heads so I decided maybe the shop where I bought them tells something of how to use them, and I found your blog and this tutorial. Thank you!!!!!! I now have a nicely riveted piece!!
Post a Comment